About
Gonzaga’s Jesuit, Catholic, Humanistic education will challenge and inspire you.
The safety of our students, faculty, staff, and visitors is important to us at Gonzaga. The Rave Guardian mobile app presents a user-friendly resource to keep the Gonzaga community safe and informed on and around campus, in addition to the Blue Light Phone boxes.
Gonzaga community members who have a valid Gonzaga email address (ending in gonzaga.edu) are encouraged by Campus Security and Public Safety to download the Rave Guardian application on your mobile device.
This app provides users with six key features to improve campus safety: an inbox, safety timers, call directory, content directory, campus security quick links, and emergency call functionality.
Learn more about the features and how to get started below.
1: Open the Apple App Store (iPhone/iPad) / Google Play (Android) app on your mobile device. Search "Rave Guardian." It should be the first app and has a blue shield logo as its icon. Download the Rave Guardian App to your mobile device.
2: Open the Rave Guardian App and ensure your organization region is set to U.S. Enter your mobile phone number into the "Enter Mobile Number" box. A verification code will be sent to your device via text message.
3: After completing step two, you will be taken to a screen that asks for your organization email. Please enter your Gonzaga email address. The Rave Guardian application will only work for users with a Gonzaga email address. A verification email will be sent to the email address you entered. Copy the verification code you receive and enter it into the "Verification Code" box. Then, press continue. You will be asked to register for the app. Enter your first and last name, then press continue. This should log you into the Rave Guardian app.
4: The app will ask you to enable your location services. The app works best with location services selected as “always on,” but you may leave them off based on your preference.
The Rave Guardian app is the new Gonzaga University personal safety application. We encourage Gonzaga students, faculty, and staff to download the new Rave Guardian app. It provides users with six key features to improve campus safety: an inbox, safety timers, call directory, content directory, campus security quick links, and an emergency call functionality. A short description of each feature is listed below.
Inbox: Receive emergency alerts in the event of a major life safety incident on campus.
Call Directory: The call directory provides a list of internal and external phone numbers that could be important to have on demand in a life safety situation these include: The National Suicide Prevention Lifeline, Poison Control, Gonzaga Health and Counseling, the Center for Cura Personalis and the 24-hour Sexual Assault Hotline.
Safety Timers: The Safety Timer feature allows you to request an emergency contact to keep a “virtual” eye on you while you travel from place to place on campus through geolocation. This functionality allows you to always have a “Guardian” by your side to ensure your safety.
Content Directory: The Content Directory is a repository of links to Gonzaga University resources, ensuring you always have access to the sites and content you might need.
Campus Security Call: This feature allows you to quickly call Gonzaga Campus Security when you are in need of their services.
Emergency Call: This feature allows you to quickly call (9-1-1) in case of an emergency.
1: Press the My Account button.
2: You will be presented with four options that are shown below, including Profile Information, Emergency Contacts, 9-1-1 Profile Sharing, and Vehicles.
1: Profile Information: Press the Pencil to edit your profile information. Check the first and last name to ensure that they are correct. If necessary, adjust your language settings. Optionally, you may enter two additional email addresses and additional mobile or landline phone numbers. Press "Save" to lock in your changes.
2: Emergency Contacts: Press the "+" symbol to access the emergency contact screen. In the emergency contact screen, you will see another "+" symbol. Press the “+” symbol and a menu will pop up that will ask you to fill out emergency contact information. Enter a first name and last name for the emergency contact you want to assign. Then, select Mobile, Landline, or Email. Once you have entered your emergency contact’s information, press the check mark to save that person as an emergency contact.
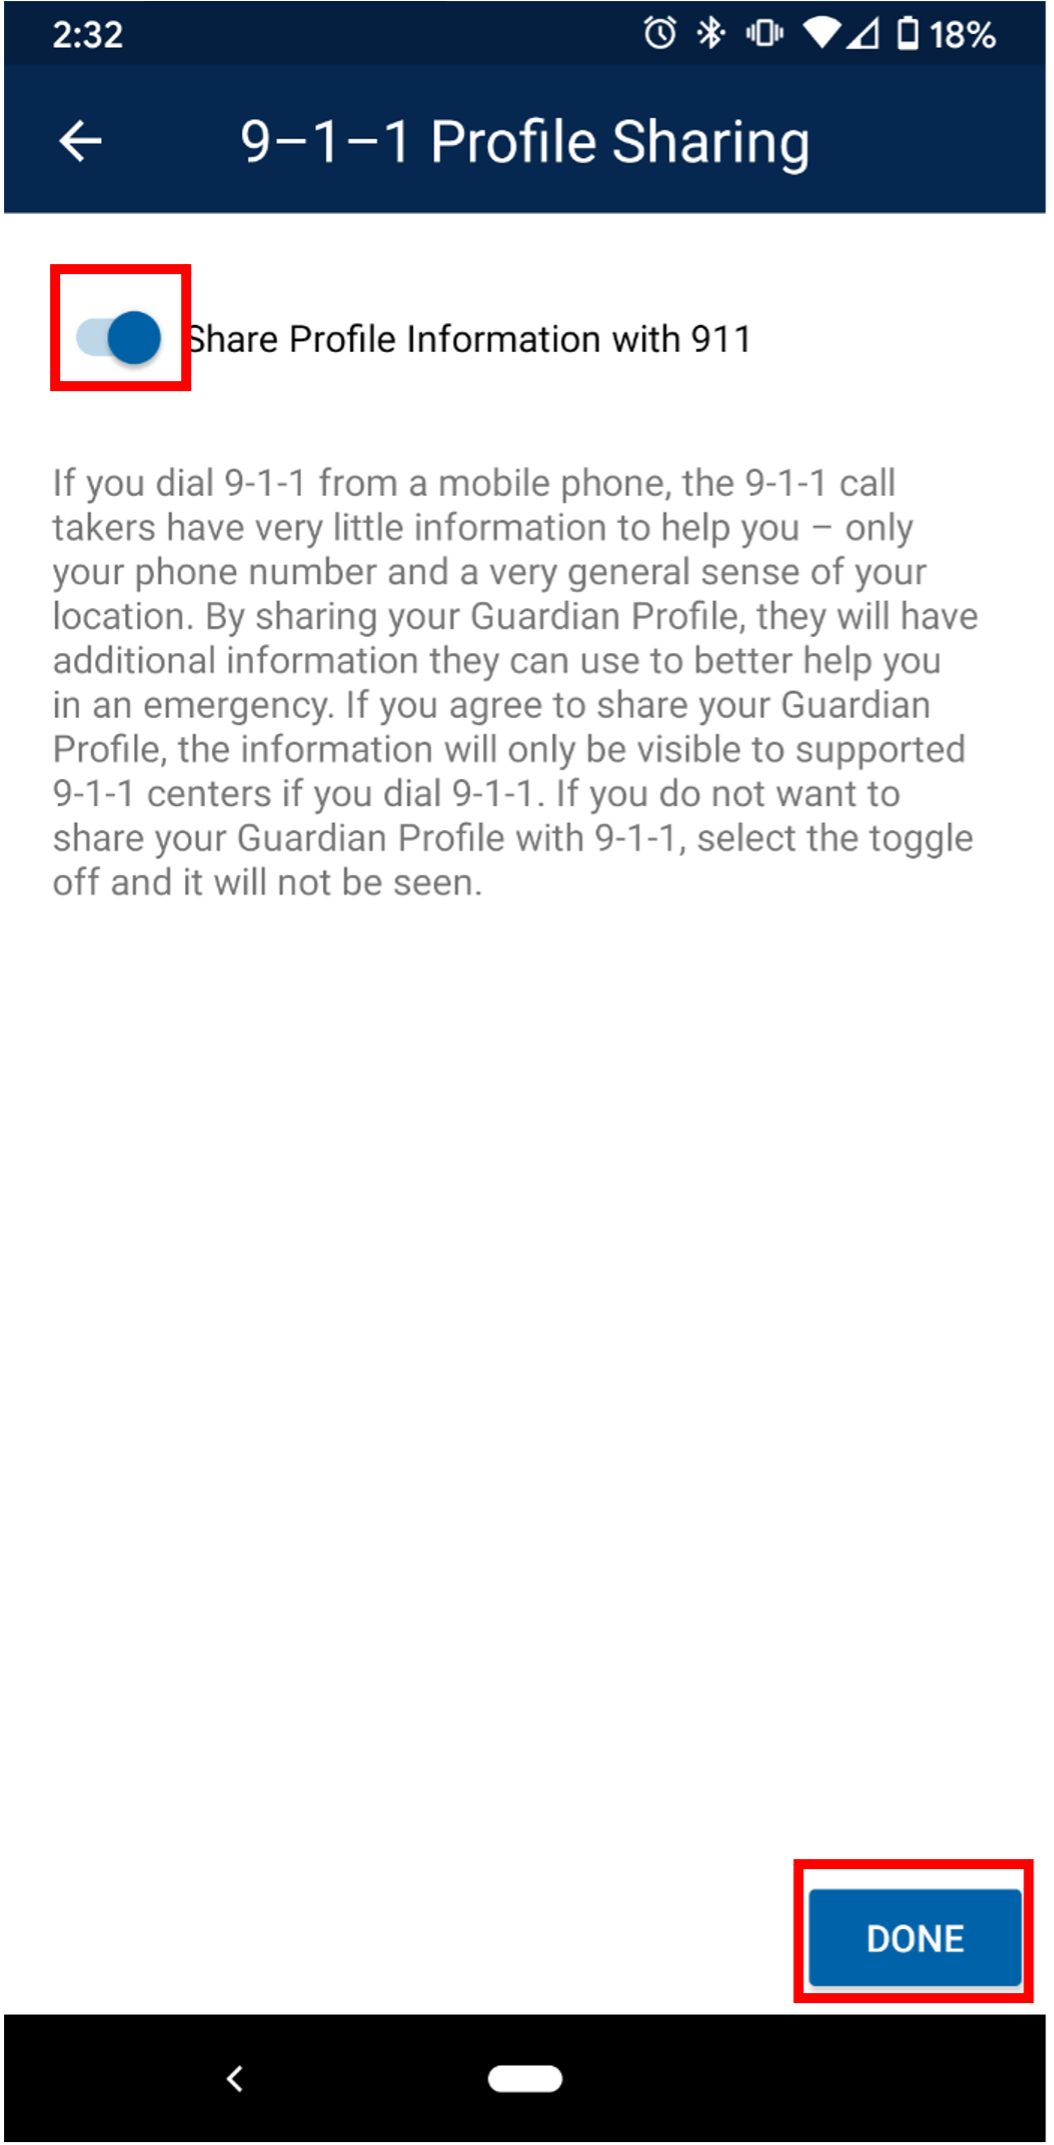
3: 9-1-1 Profile sharing: Press the Pencil to edit your 9-1-1 Profile Sharing options. Press the slider to turn off 9-1-1 Profile Sharing. Press Done to confirm this selection. Then tap the Pencil icon again and turn on 9-1-1 profile sharing. To finish, press Done to confirm your selection.

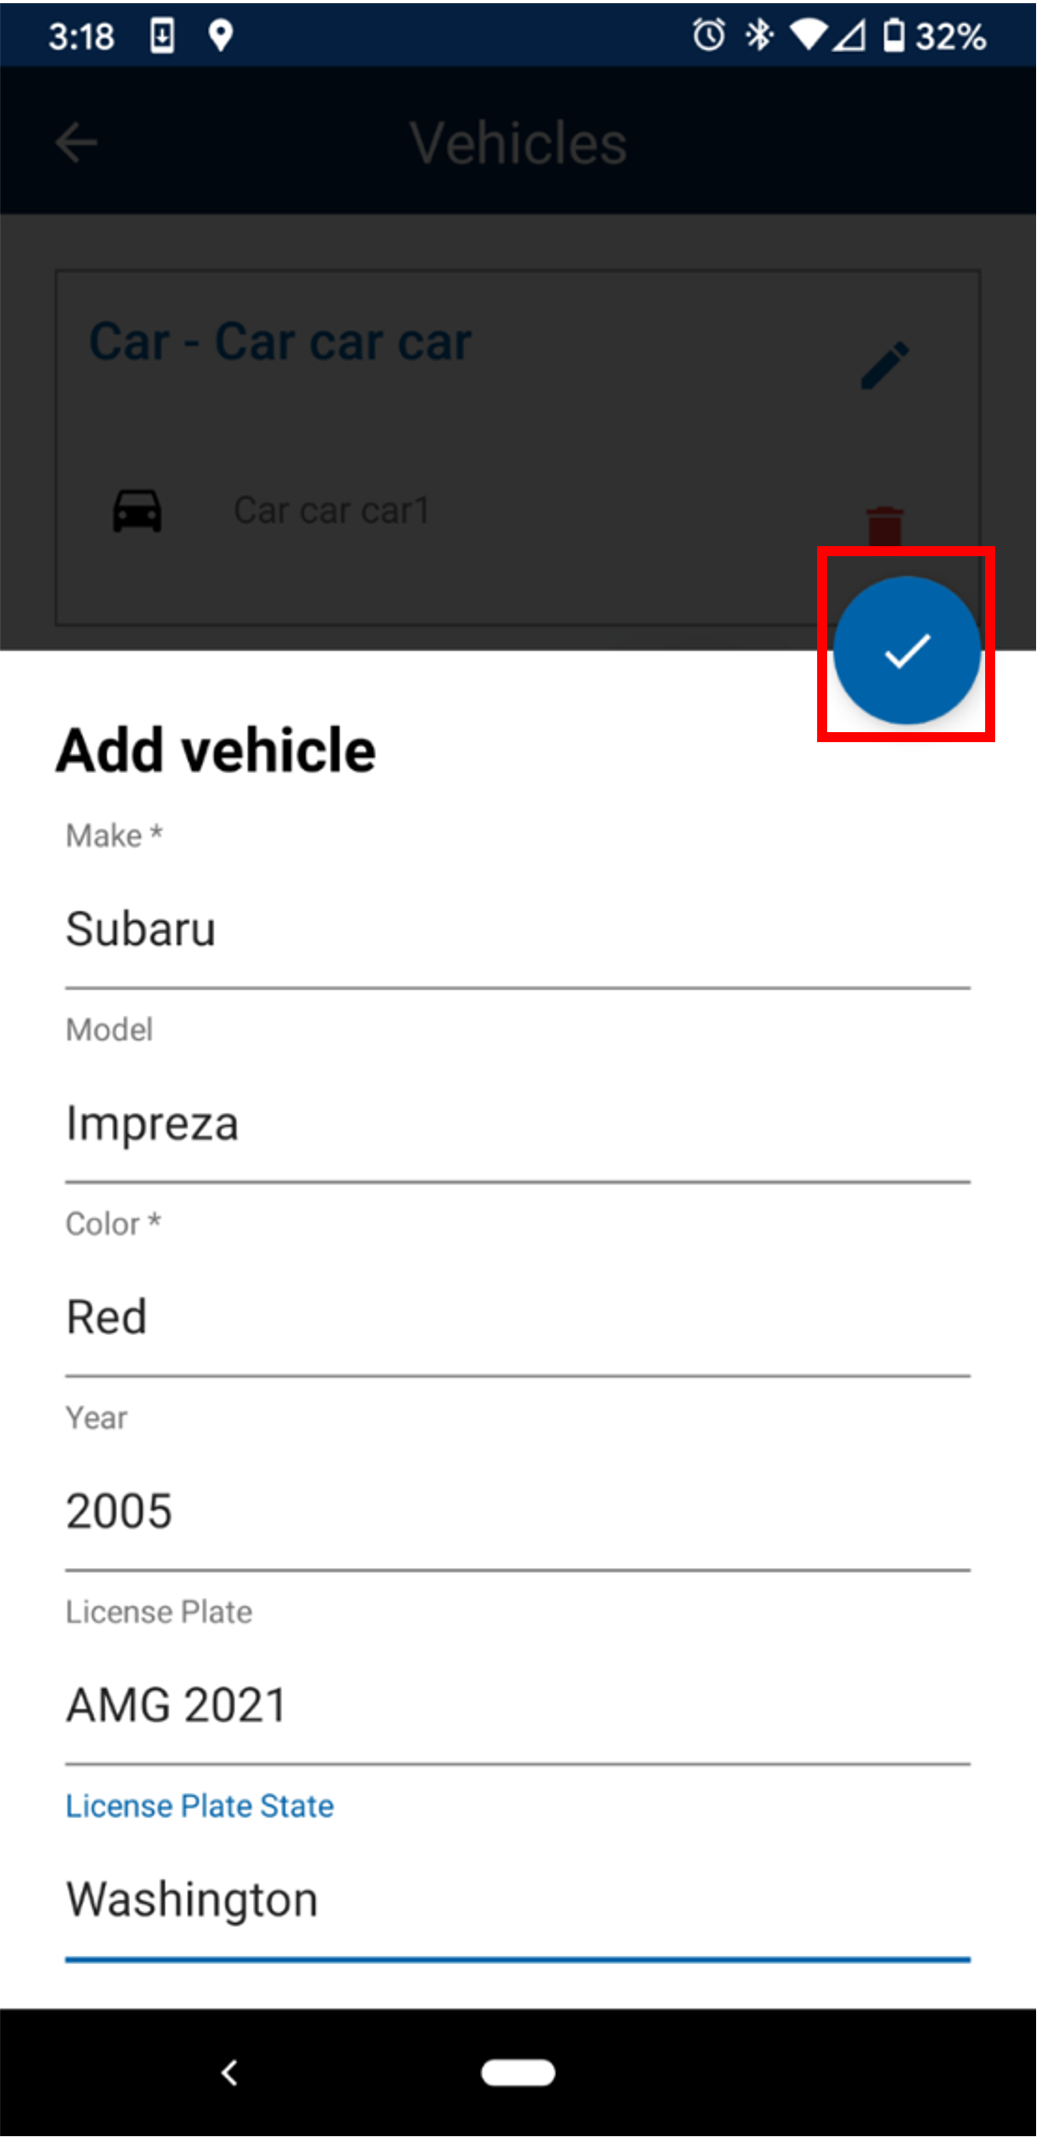
4: Vehicles: Press the "+" symbol to open the Vehicles menu then Press the "+" symbol to add a Vehicle to your account. Fill in the make, model, color, year, license plate number, and license plate state. Then, press the check mark symbol to confirm this information.

1: Open your Rave Guardian app and select the Content Directory button.
2: Browse the listings. Scroll up/down to view more listings.
3: Tap on the content desired. You will be redirected to the website landing page. Browse the content on the webpage. To return to the Content Directory page, press "Done" in the upper left corner or press “<” or “X” in the upper left corner. Pressing the "<" from the Content Directory page will return you to the main Guardian app page.
Open the Guardian application. If location services on your cell phone is not on "Always," then tap on the message "Location is Restricted" in the yellow ribbon. Tap "Enable Now." Change location setting to "Always." Exit settings and re-open the Guardian application.
1: Open the Guardian application.
2: Tap the "Safety Timers" icon. Press the "+" icon in the "Family & Friends" section to open your contact list to select a guardian.
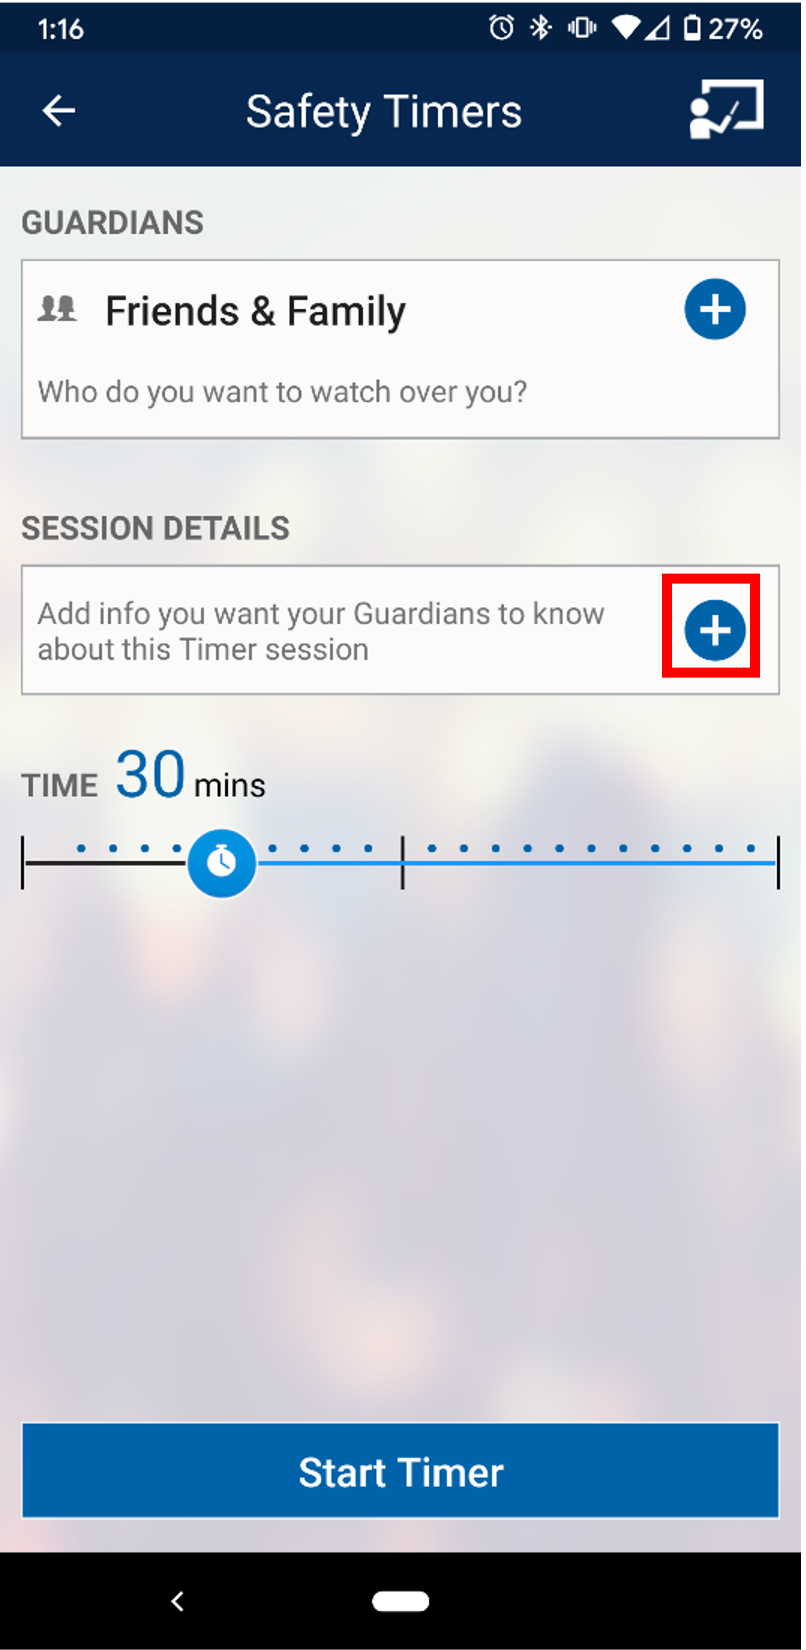
3: After you select a guardian, tap "Done." Tap the "+" icon in the "Timer Session Notes." Enter your session notes which should include your starting point, destination, approximate time for transit, and what you are doing. Select "Done" when your notes are complete. Press the green confirmation arrow.

4: Set the amount of time you expect to be in transit to your destination by moving the stopwatch icon left or right.
5: Tap the "Start Timer" button. A confirmation window will appear with information about your session.
6: Tap "Start Timer" to confirm and start your safety timer session.
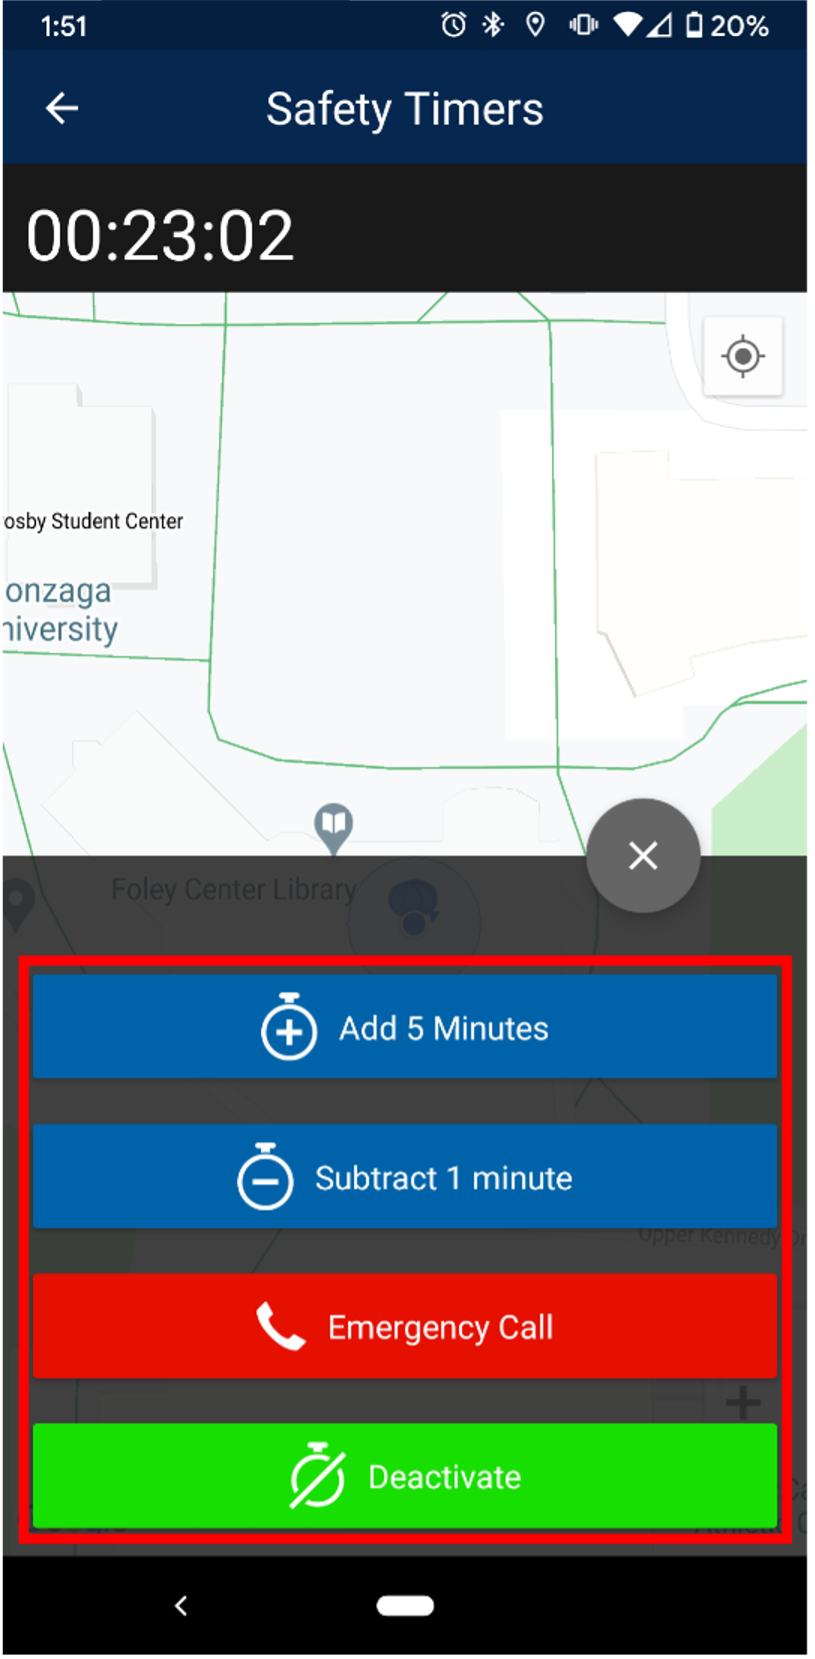
7: After starting a safety timer session you will be taken to a map. From this map you will be able to see your location and modify your needs. By pressing the stopwatch button, you will be provided with four options: add an additional five minutes to your session, subtract one minute from your session, place an emergency call, and end/deactivate your safety timer.

8: After reaching your location, you will need to manually deactivate your safety timer.
1: Open the Rave Guardian app and tap on the red 9-1-1 Emergency Call icon.
2: By default, your location will be shared with safety officials. If you do not want to share your location with a safety official, uncheck the box and tap the red Place Call box.
3: Tap "Call 9-1-1" when the app confirms you want to make this call. This will connect you to 9-1-1 services.
Note: Calling 9-1-1 when there is not an emergency can be considered as a punishable offense. Only use this feature for true emergencies.
1: Open the Guardian app. Tap on the Campus Security icon.
2: By default, your location will be shared with safety officials. If you do not want to share your location with a safety official, uncheck the box and tap the red Place Call box.
3: Tap "Call Campus Security" when the app confirms you want to make this call.
1: Open the Guardian app. Tap on the Call Directory phone icon.
2: Select the organization you would like to call.
3: Tap "Call" when the app confirms you want to make this call. Then, tap on the phone number provided on the screen.